
Camel is the best way of transport in deserts. With such useful help in the desert region, camel is the most humble and lovable animal. It is a giant mammal who can survive in deserts easily. Camels have the exceptional quality to store about 40 gallons of water in just three minutes. Such huge water storage capacity let him survive for 10 days without drinking water.
It is very fun to draw this mammal on paper. There are two types of camels you must know before starting. The camels with a single bump are different from those with two. The camels having a single bump on their back are known as Dromedary whereas those having two bumps like B shape are known as Bactrian camels.

You must first learn to draw the one having D shape on back known as Dromedary camels. It is easy to start after which you can feel comfortable in drawing Bactrian camels. Easy Animal Drawing can help you be creative. Here is the complete guide of How to Draw a Camel Step by Step. Also, here we present some Cute Easy Animal Drawings Ideas. Have a look-
How to Draw a Camel Step by Step
Art supplies you will need:
To start with the guide of Easy Animal Drawing, you must note down the essential art supplies you will need. These supplies will make your drawing easy and attractive too. Here is the list of must-have items to start tutorial of How to Draw a Camel Step by Step.
Pencil set with different shades

This will help you practice drawing and shading art. Keep a sharpener and eraser for convenience.
A bold marker (preferably black colored)

It will help you draw outlines with a clean and bold black line.
Sketch pad
You must keep a sketch pad with you on traveling. You can also start drawing on a clean drawing paper.
Step by step guide

-
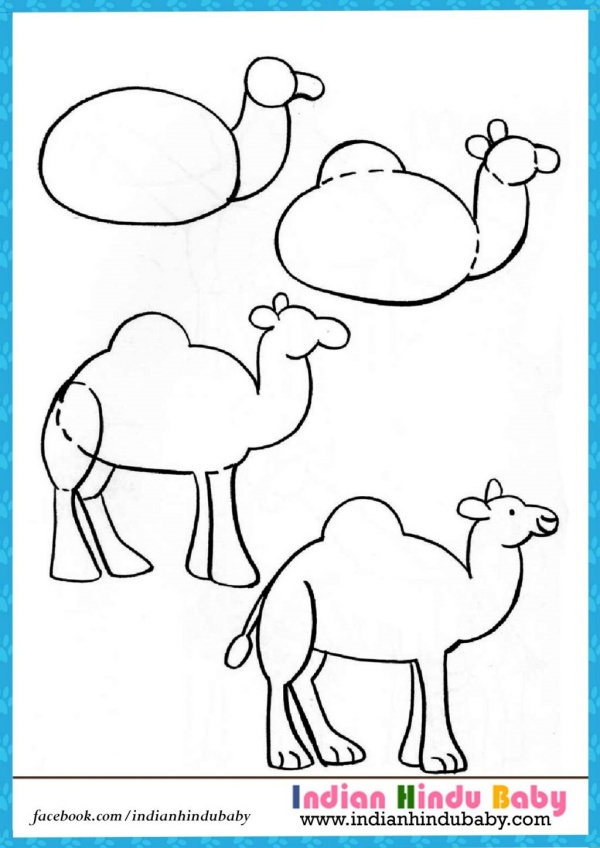
- Start Easy Animal Drawing with the basic shape i.e. circle. Draw a small circle for the head and a big circle for camel’s body. Take some distance between two circles to draw the necklines.

-
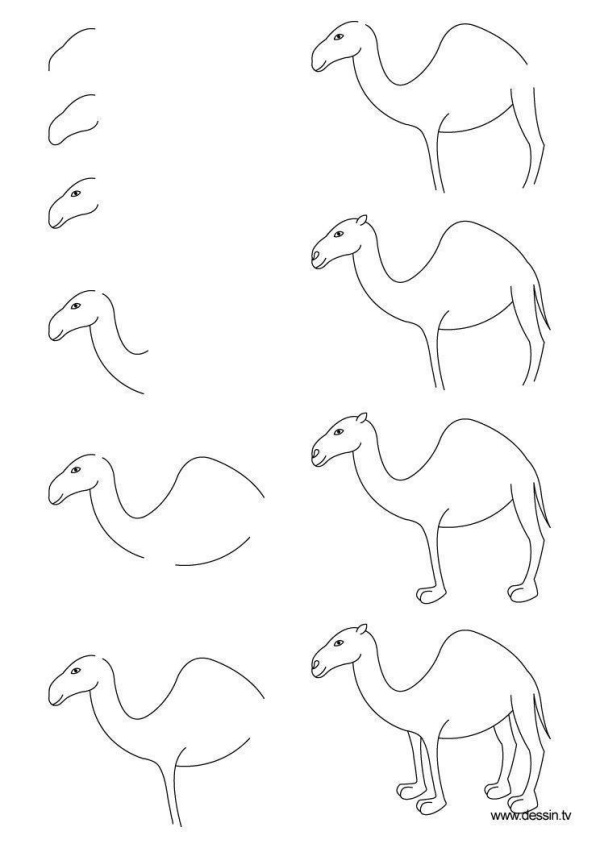
- Now you have to join these two circles forming the neck of a camel. Begin with two parallel lines from the small circle. Practice the divergence in these parallel lines to draw perfect neck pattern.

-
- It is time to detail the head of the camel. You need to use the basic circle drawn for the head to form the head shape.
- Add detailed head shape with curved lines for forehead, lower jaw, and snout.
-
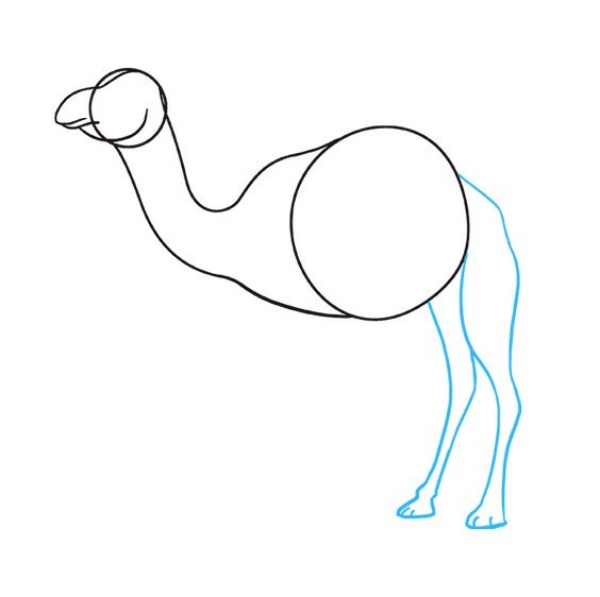
- First, draw the rear legs pair in proportion to the body. You have to draw a pair of parallel lines for each of these rear legs. Explore how these rear legs are designed. It is wide at the thighs and becomes thin just above the knees. Camel has narrow legs from knees to ankle. Notice how pointed knees camel has.
- When you are done with the thighs, knees, and ankle, draw curved lines to show the bottom of the foot. Bottom of the foot will be nearly square in shape drawn with curved lines. Draw small lines to show separate toes.
If you adopt an animal, you will notice that the adoption experts will request you to ensure that you are feeding the animal at least once every two-three hour. Well, well! If these surprises weren’t enough, read further to have a look at some of the Pictures of Animals with their Favorite Food.
-
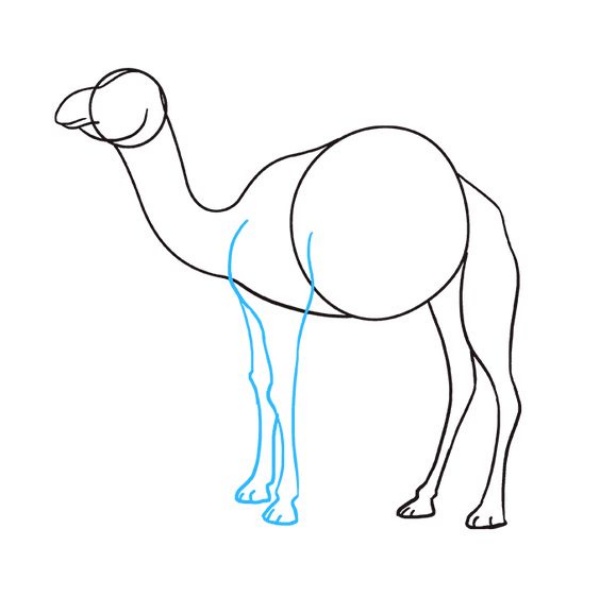
- Now you can start front legs of the camel same like the curved lines like rear legs. Front legs are wider at the joint of the shoulder and have pointed pattern of the knees. Narrow the lines towards the ankle to give perfect shape to the legs. Draw curved lines to enclose the feet. Use small short lines that show toes of the camel.

-
- It is the final camel shape you wished to draw. When you are perfectly satisfied with the shape, you can erase all the lines of basic shapes. Erasing these guidelines will give you a neat and clean outer shape of the camel.

-
- Here is the detailing step of the guidelines for How to Draw a Camel Step by Step. You can draw the face of the camel in detail in the head part. Backward C shaped lines should be drawn to show ears. You can further detail ears with small c shape inside it.

-
- Draw the nostrils of the camel with small circles. Detail the eyes with a teardrop shape and a small circle within it. This small circle will form the pupil. Feel up the pupil with dark shade. Draw small curved lines for eyebrows above the eyes. Camel has a small and narrow tail. Draw two parallel lines to show this cute little tail which is almost half of his height. Let these two parallel lines meet at the end. From this endpoint, you need to draw curved lines for the hair texture.
Here we have some Easy And Practicable Tailandfur Sketches. Check out-

- Your camel drawing is ready with the Easy Animal Drawing You can now color it and collect appreciation. You must color camel with the tan and brown shades to make it similar to the original camel.

Some animals enjoy the blissful showers, some hate them to the core. Sure, you would want to have a glimpse of the animal kingdom feeling the rain, don’t you? If yes, lure your eyes with this Excellent Photography of Animals in Rain.

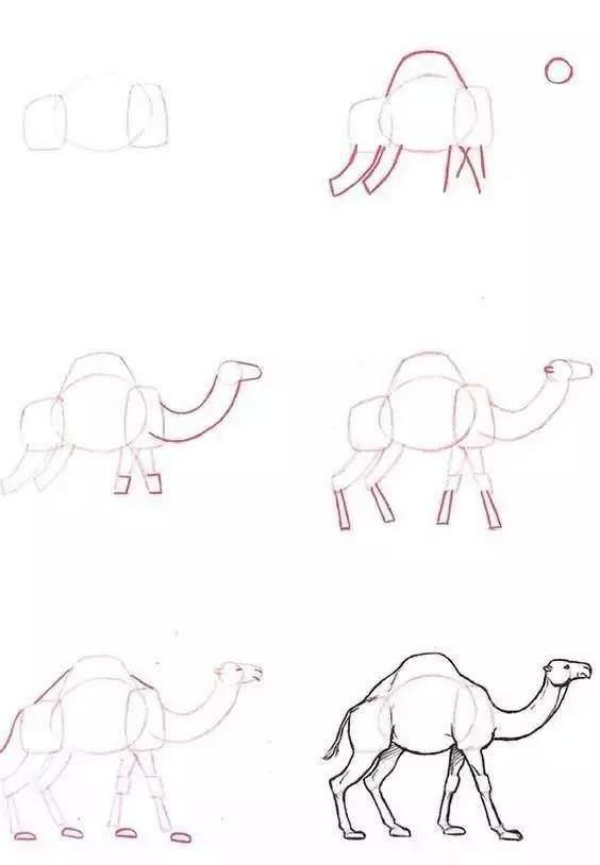


This guide of How to Draw a Camel Step by Step is easy and quick. Follow these simple steps to practice Easy Animal Drawing. Once you draw this single bump camel you can easily go for the camel with two bumps. You can finish your drawing with some background like the sand and shadow just like the desert view. It will look beautiful altogether.